When you have finished knitting the length of your project, you must finish the edge. This is called binding off (or casting off). The standard bind-off creates a clean, solid edge that secures your stitches so that your project won't unravel when taken off the needles.
Step-by-Step: Standard Bind-Off
Knit two
Knit the first two stitches as normal, so both sit on the right needle.
Lift the first
Slide the left needle into the first stitch on the right needle — the one further from the tip.
Pass it over
Lift that stitch up, over the second stitch, and off the needle entirely.
Repeat
One stitch remains. Knit one more and repeat, until a single stitch is left to fasten off.
The whole bind off is one move — lift the first stitch over the second — repeated to the end of the row.
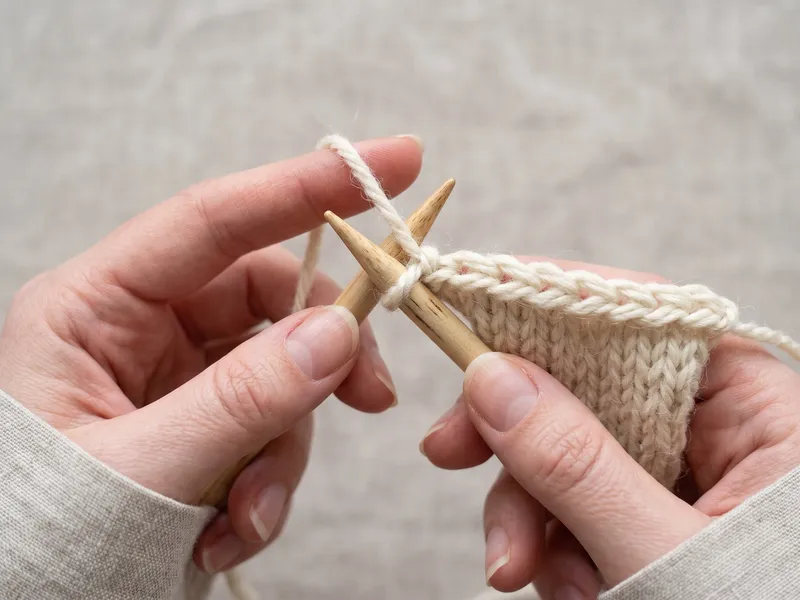
You typically bind off from the right side (RS) of your work. Here is how you do it:
Step 1: Knit Two Stitches
Knit the first two stitches on the left needle. You now have two stitches on the right needle.
Step 2: Insert Left Needle Tip
Insert the tip of the left needle into the first stitch you knitted (the back stitch on the right needle), from left to right.
Step 3: Lift Over
Lift that back stitch up, over the front stitch (the one knitted last), and off the right needle. You are left with one stitch on the right needle. You have bound off your first stitch!
Step 4: Repeat
Knit the next stitch from the left needle, so you have two stitches on the right needle again. Repeat the process of lifting the back stitch over the front stitch and off the needle. Do this until you have knitted and bound off all stitches from the left needle.
Step 5: Secure the Tail
At the end, you will have only one loop left on your right needle. Cut the yarn (leave about 6–8 in / 15–20 cm of tail for weaving). Pull the knitting needle upward to expand the loop, feed the cut end through this loop, and pull snug to lock the knot.
Tip for an Elastic Bind-Off
A bind-off that is too tight is easy to do. If you bind off a sock cuff or sweater neck too tightly, the edge won't stretch enough to fit over the foot or head.
Solution: Try a needle one or two sizes larger just for the bind-off row. Alternatively, you can use a stretchy bind-off method like the Italian bind-off, which suits ribbing.
See how it's done
Sometimes it's easier to see the technique in action. Here is a clear step-by-step video showing how to do the basic bind-off:
Video from Purl Soho
Frequently Asked Questions
Why does my bind-off edge come out too tight?
The usual fix is a needle one or two sizes larger just for the bind-off row, or a stretchy technique like the Italian bind-off.
Can I bind off on the wrong side?
Yes, the principle is exactly the same: work each stitch the way it appears — purl the purl stitches, knit the knit stitches — before lifting the previous one over. On a purl row in stockinette that means purling every stitch; in ribbing, you bind off in pattern (knit over knit, purl over purl).
How much tail should I leave?
Leave at least 6–8 in15–20 cm of tail after the last stitch, so you have enough to weave in securely on the wrong side.
Can I bind off with a different needle size than the rest of the garment?
Yes, and it's often recommended! Switching to a larger needle just for the bind-off row is the easiest way to avoid a too-tight edge.