Knitting Tool
Knitting Gauge Calculator
Measure your swatch to find out if your tension is too tight or loose, which needle size to switch to, and exact stitch counts for your project.
How to use the calculator
- 1 Knit a swatch
Measure stitches over 10 cm on a washed and blocked swatch.
- 2 Enter numbers
Enter the pattern gauge and your measured gauge into the tool.
- 3 Get recommendations
See needle size adjustments and tailored stitch counts.
Could not save. Your browser may be full or in private mode — write down anything you need, because it will be gone when you reload the page.
Result: Knitting Gauge
Gauge Calculator
Compare your actual knitting gauge with the pattern requirements. Get exact needle size recommendations and custom stitch counts to achieve the perfect fit.
A Norwegian version of this page is available on Strikketips.no
Why use a knitting gauge calculator?
Knitting gauge (also called tension) is perhaps the most critical factor for a successful knitting project. Many skip knitting a swatch because they are eager to start, but this can easily result in a sweater that is either way too large or way too small.
A gauge calculator helps you calculate gauge and compare your personal tension with the pattern requirements. Did you know that a difference of just 1-2 stitches per 4 in10 cm can add up to over 4 inches10 cm of difference in the final circumference of a sweater? This is why experienced knitters always check their gauge.
The calculator is also invaluable when substituting yarn or using alternative fiber types. It tells you exactly which direction to adjust your needle size.
How to calculate knitting gauge manually
If you want to understand the math behind gauge, the formulas are relatively simple. Here are step-by-step instructions:
Formula for calculating your gauge
Gauge (sts per 4 in) = (Number of stitches counted ÷ Swatch width in inches) × 4
Metric formula: Gauge (sts per 10 cm) = (Number of stitches counted ÷ Swatch width in cm) × 10
Example
You have knitted a swatch and count 24 stitches over a width of 4.8 in12 cm:
- 24 stitches ÷ 4.8 in = 5 stitches per inch
- 5 stitches per inch × 4 = 20 stitches per 4 in10 cm
If the pattern requires 22 stitches per 4 in10 cm, your stitches are too loose, and you should go down in needle size.
Formula for adjusting needle size
If your gauge is off, you can estimate what size needles to switch to:
- If you knit tightly (more stitches than the pattern): Go up roughly one US size (0.5 mm) for every 1–2 stitches of difference
- If you knit loosely (fewer stitches than the pattern): Go down roughly one US size (0.5 mm) for every 1–2 stitches of difference
Always knit a swatch before starting. Even if you use the recommended needle size, your personal tension may vary!
From gauge to stitch counts
Once your gauge matches, you can use it to work out how many stitches to cast on: stitch count = desired width (inches) × (gauge ÷ 4). The table shows typical stitch counts for three common projects:
| Gauge (per 4 in / 10 cm) | Sock (8.5 in / 22 cm circumference) | Hat (20 in / 50 cm circumference) | Sweater (40 in / 100 cm circumference) |
|---|---|---|---|
| 18 stitches | approx. 40 stitches | approx. 90 stitches | approx. 180 stitches |
| 20 stitches | approx. 44 stitches | approx. 100 stitches | approx. 200 stitches |
| 22 stitches | approx. 48 stitches | approx. 110 stitches | approx. 220 stitches |
The numbers are rounded to the nearest whole repeat and apply to stockinette without negative ease. Hats and socks are knitted narrower than the head/foot measurement for a good fit — the hat calculator uses 3.5% for a slouchy fit, 8% for standard and 11.5% for snug – our hat guide shows the full calculation, and the increase and decrease assistant distributes any increases evenly after the ribbing.
Tips for perfect results
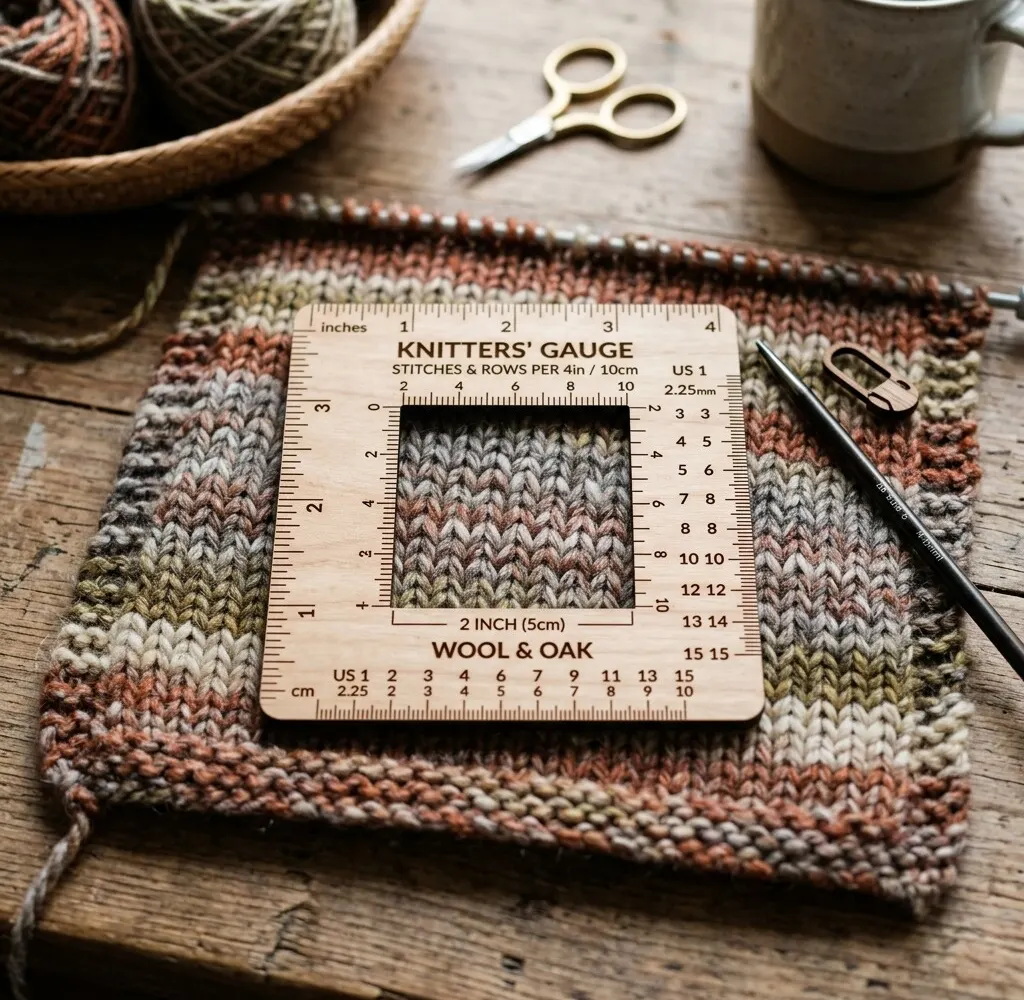
- How to count stitches accurately: Use a ruler or a tension gauge tool. Place it in the middle of your swatch, away from the edges where stitches can be uneven. Count all whole and half stitches.
- Why is my gauge incorrect? Many factors affect your tension. Your personal yarn tension is primary, but needle material (wood vs. metal), how you hold the yarn, and even your stress level play a role! Our gauge troubleshooting guide covers every adjustment.
- Tips for a perfect swatch: Cast on 10-15 more stitches than what is required for 4 in10 cm. Knit at least 5-6 in12-15 cm high. Always wash and block your swatch before measuring!
What knitting gauge actually is
Gauge is the density of your fabric: how many stitches and rows fit inside a fixed measurement, normally 4 in10 cm of blocked stockinette. It is not a property of the yarn and not a property of the needles — it is what the yarn, the needles, the stitch pattern and your own hands produce together. Our complete gauge guide covers why that matters and how far wrong a single stitch of difference takes you. The rest of this page is about the part the guide doesn't cover: getting a trustworthy number out of a swatch, and doing the arithmetic when it doesn't match.
Why your gauge swatch lies
Most gauge problems are not knitting problems — they are measuring problems. The swatch tells the truth about a piece of fabric; it just often isn't the fabric your garment will be made of. Four things go wrong most often.
The swatch is too small
A 4 × 4 in (10 × 10 cm) swatch leaves you nothing to measure. The edge stitches on every knitted piece are looser and more irregular than the stitches in the middle, and on a tiny swatch those distorted stitches are most of the swatch. Cast on enough stitches for at least 6 in15 cm of width and work at least 6 in15 cm in height, so you can lay your ruler down well inside the fabric with margin on all sides.
You measured too close to the edge
Keep the ruler at least three or four stitches away from the side edges and several rows away from the cast-on and the live stitches. Measure in two or three different places on the swatch and average them — real handknitting is never perfectly uniform, and a single measurement can easily be half a stitch off in either direction.
You stretched it, or pinned it, or held it
Lay the swatch flat on a table and let it settle. Don't hold it in the air, don't smooth it out with your hand, and don't pin it under tension. Knitting is elastic; if you help it along even slightly, you will measure a gauge that the garment will never actually have once it is hanging off a body.
You didn't block it
This is the big one, and it deserves a section of its own.
Block the swatch before you measure it
Wool, alpaca, cotton and linen all move when they meet water. Wool relaxes and evens out; superwash wool and many plant fibers relax a great deal and can grow noticeably; some yarns tighten up slightly instead. Whatever your yarn does, it will do it to your finished garment the first time you wash it — so you want it to happen to the swatch first, while the information is still useful.
Block the swatch in the same way you plan to block the garment. If the garment will be washed by hand and laid flat, wash the swatch by hand and lay it flat. If it will go in the machine, put the swatch through the machine. Let it dry completely before you bring a ruler near it — damp knitting is longer and narrower than dry knitting.
An unblocked swatch is the single most common reason a sweater comes out of its first wash two sizes too big. If you only take one habit away from this page, make it this one.
Gauge in the round versus flat knitting
The same yarn, the same needles and the same knitter will usually produce a different gauge worked in the round than worked flat. The reason is that flat stockinette alternates knit rows and purl rows, and almost nobody purls at exactly the same tension at which they knit. Knitting in the round is all knit stitches, so that alternation disappears and the fabric comes out more even — and, for most knitters, slightly tighter.
The practical rule is simple: swatch the way you will knit. If the garment is a seamless yoke sweater worked in the round, work your swatch in the round too. If the pattern is worked flat in pieces and seamed, swatch flat.
For a round swatch you don't need to commit to a whole tube. Cast on with a long circular needle, knit one row, then slide the stitches back to the other end of the cable without turning, leave a long loose strand across the back and knit the next row from the right side again. You get a flat piece worked entirely in knit stitches, which behaves like knitting in the round. Cut the floats before blocking so nothing pulls in.
If you have already knitted the swatch flat and don't want to redo it, at least be aware of the direction of the error: run the two numbers through the calculator above and treat the result as an estimate rather than a verdict.
Troubleshooting common gauge problems
| Symptom | Likely cause | What to do |
|---|---|---|
| Too many stitches per 4 in10 cm | You knit more tightly than the pattern's knitter | Go up in needle size and swatch again |
| Too few stitches per 4 in10 cm | You knit more loosely than the pattern's knitter | Go down in needle size and swatch again |
| Stitch gauge is right, row gauge is off | Needle size fixes width first; height follows less predictably | Keep the stitch gauge and convert row counts to inches (cm) instead, or adjust the number of rows in shaping sections |
| Gauge changed after washing | The swatch was measured unblocked | Always block before measuring; re-measure and recalculate from the blocked numbers |
| Gauge is right on the swatch but wrong on the garment | The swatch was worked flat and the garment in the round (or the reverse) | Re-swatch in the same construction as the garment |
| Gauge drifts over a large piece | Tension changes with tiredness, TV, stress, or a switch between needle sets | Finish a piece on one set of needles, and check your gauge again partway up |
| Correct gauge, but the fabric feels stiff and boardy | The yarn is too thick for the gauge the pattern asks for | Prioritise a good fabric; pick a thinner yarn, or reselect the size using your own gauge |
| Correct gauge, but the fabric is limp and sees through | The yarn is too thin for that gauge | Change to a slightly heavier yarn, or work at a firmer gauge and recalculate the stitch counts |
| Ribbing pulls in far more than expected | Ribbing has its own gauge, always denser than stockinette | Never measure your main gauge over ribbing; swatch it separately if the pattern gives a rib gauge |
| Nothing helps, whatever needle you try | The yarn simply doesn't want to sit at that density | Change yarn, or keep your own gauge and recalculate the pattern to your numbers |
If several of these apply at once, our gauge troubleshooting guide walks through the adjustments one at a time.
A knitting gauge converter for centimeters and inches
Patterns don't agree on units. American and British patterns state gauge over 4 inches; Scandinavian and most European patterns state it over 10 cm. Those two are close but not identical — 4 inches is 10.16 cm — so a gauge quoted per 4 inches is about 1.6 % looser than the same number quoted per 10 cm.
On a scarf that difference disappears. On a 200-stitch sweater body it is worth roughly 0.6 in1.5 cm of circumference, which is enough to notice at the underarm. The conversion itself is straightforward:
- Stitches per 4 inches = stitches per 10 cm × 1.016
- Stitches per 10 cm = stitches per 4 inches ÷ 1.016
In practice: 20 stitches over 4 inches is about 19.7 stitches over 10 cm, and 22 stitches over 10 cm is about 22.4 over 4 inches. Convert first, then compare — never compare a per-inch number directly against a per-centimeter number. Our unit converter handles lengths and weights, and the needle size conversion tool translates US needle numbers to millimeters when you're working from an American pattern.
How to calculate knitting gauge from an odd swatch
You don't need a swatch that happens to be exactly 4 in10 cm wide. Count the stitches across whatever width you can measure cleanly, then scale: gauge (per 4 in) = (counted stitches ÷ measured width in inches) × 4.
Counting is easier if you don't rely on your eyes alone. Push a locking stitch marker or a pin through the fabric at the start and end of your measured section before you count, so the ruler can't drift. Count half stitches as halves — rounding to whole stitches throws away exactly the precision you knitted the swatch for. Work the same way vertically for row gauge: count the rows over a measured height and scale to 4 in10 cm.
If you already know the gauge and want to go the other way, the same relationship gives you cast-on numbers: stitches = desired width in inches × (gauge ÷ 4). That is the calculation behind the stitch count table further up this page.
Working out the needle adjustment
When the gauge is wrong, the question is not just which direction to go but how far. The calculator at the top of this page suggests a direction; here is the reasoning behind it, so you can sanity-check the suggestion against your own yarn.
There is no reliable conversion from stitches off to millimeters of needle. How far a needle change moves your gauge depends on the weight and fiber of the yarn, on the stitch pattern and on how tightly you hold the working thread — fine yarns react more sharply per half millimeter than heavy ones, because each stitch is a larger share of the total. Go one step in the right direction, knit another swatch and measure again. If you are a long way off you can try two steps, but it is still the swatch that decides, not the arithmetic.
- Too many stitches (knitting too tightly): go up in needle size.
- Too few stitches (knitting too loosely): go down in needle size.
- Half a stitch off: try a different needle material before changing size. Wooden and bamboo needles grip the yarn and tend to produce a slightly firmer fabric than slick metal ones.
- Still off after two attempts: stop chasing the pattern's gauge. Choose the needle that gives the fabric you actually want, then recalculate the pattern to your own gauge — or pick the pattern size whose stitch count gives the right measurement at your gauge.
That last option is worth taking seriously. A pattern's gauge is a means to an end, and the end is a garment that fits and a fabric that drapes. If matching the stated gauge means knitting a fabric you dislike, you have matched the wrong thing.
What do I do if my knitting gauge is incorrect?
If you have more stitches per 4 in10 cm than the pattern (knitting tightly), you should go up in needle size. If you have fewer stitches (knitting loosely), you should go down in needle size.
How do I work out stitch counts from my gauge?
Multiply your desired width (in inches) by your gauge per inch (gauge ÷ 4). Example: a hat with a 20 in50 cm circumference and a gauge of 20 stitches per 4 in10 cm gives 20 × (20 ÷ 4) = 100 stitches. The table on this page shows pre-calculated stitch counts for hats, sweaters and socks.
How big should my gauge swatch be?
Cast on 10–15 stitches more than the pattern states per 4 in10 cm, and knit until the swatch is at least 5–6 in12–15 cm tall. That lets you measure in the middle of the swatch, away from the uneven edge stitches. Wash and block the swatch before measuring.
Why is it important to wash the gauge swatch?
Many yarns change after washing. Some stretch, while others shrink. Washing your swatch ensures the garment fits even after its first wash.
What if my gauge still doesn't match?
If changing needle size isn't enough, try needles in a different material (wood has more grip than metal), change how you hold the yarn, or consider a different yarn. Our gauge troubleshooting guide walks through every adjustment step by step.