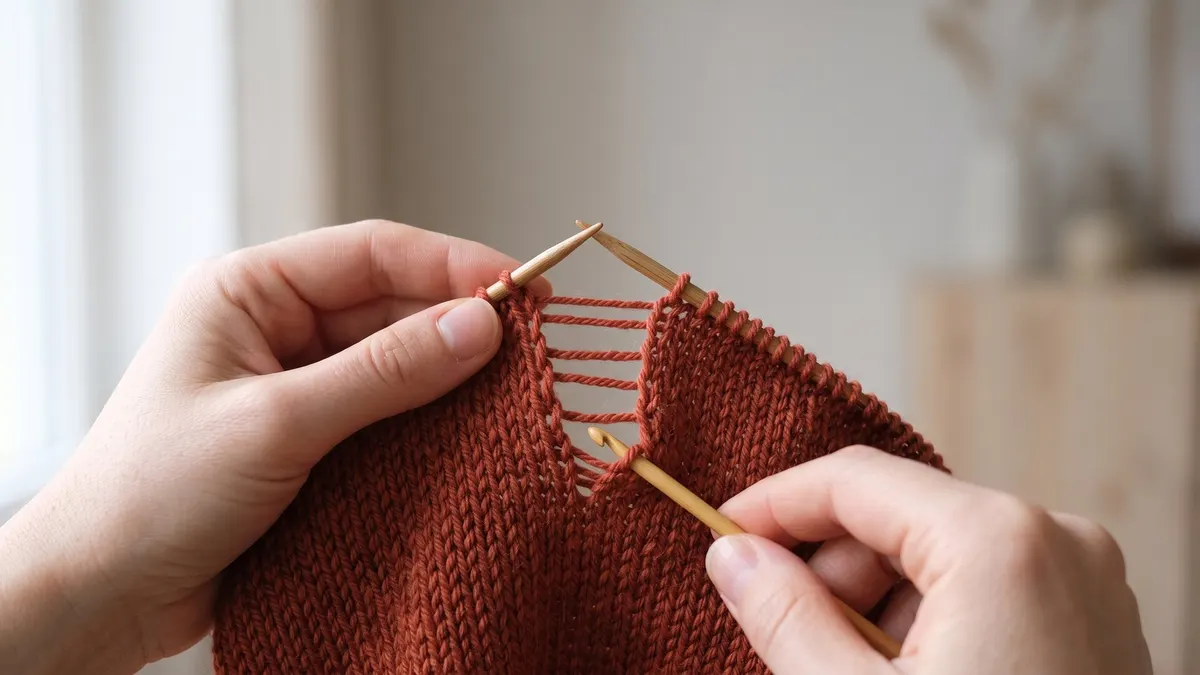
Secure the loose loop with a safety pin straight away. Then insert a crochet hook into the stitch from the front, catch the lowest horizontal strand and pull it through. Repeat once per dropped row until you reach the top, and put the stitch back on the needle with its right leg in front.
A dropped stitch doesn't mean ripping out your work. The stitch has left a ladder of horizontal strands behind it — one per row — and each strand is a stitch waiting to be pulled back through. A crochet hook does that one row at a time. It's simplest in stockinette stitch; other stitch patterns just need you to know which way each row goes.
A Norwegian version of this page is available on Strikketips.no
First: stop it running
The moment you see the loose loop, put a safety pin, a crochet hook or a spare needle through it. The pin holds the stitch at the bottom of the ladder while you get the hook. Everything else can wait.
Fixing a dropped knit stitch
Work from the right side, where the stitch should look like a V. Count the strands in the ladder — that is how many rows you have to climb.
-
Insert the hook
With the right side facing you, insert the crochet hook into the dropped stitch from the front to the back.
-
Catch the lowest strand
Find the lowest horizontal strand of the ladder, directly above the stitch, and catch it with the tip of the hook.
-
Pull it through
Pull the strand through the loop on the hook. The new loop on your hook is the stitch one row higher.
-
Repeat to the top
One strand per row, all the way up. Then put the last loop back on the left needle with the right leg of the stitch at the front, so it doesn't knit up twisted.
Fixing a dropped purl stitch
A purl stitch is the mirror image of a knit stitch. You can turn the work and fix it as a knit stitch from the wrong side, or stay on the right side and reverse the hook: insert it into the loop from the back to the front, catch the horizontal strand that sits in front of the stitch, and pull it through to the back.
Ribbing, garter and seed stitch
In a stitch pattern, each rung of the ladder has to go back as the kind of stitch it was. Seen from the right side:
| Stitch pattern | Each row of the ladder |
|---|---|
| Stockinette | Knit, every row |
| Ribbing | The same all the way up: knit on every row in a knit column, purl on every row in a purl column |
| Garter stitch (knit flat) | Alternates: knit one row, purl the next |
| Seed stitch | Alternates: each row is the opposite of the one below it |
Look at the neighboring stitches before you start. They show you what the dropped one should look like on each row. For other stitch patterns, the chart or the written rows tell you the same thing.
No crochet hook?
You can use the tip of a knitting needle, with more care and patience. Insert the tip into the loop and scoop the lowest strand through the stitch, one row at a time. It works best when the stitch has only dropped one or two rows; for a long ladder, a crochet hook is far easier.
When laddering up won't do
If the stitch has run all the way down and left a visible hole, see fixing holes in knitting. In lace and cables, where a dropped stitch is harder to ladder back into the pattern, a lifeline threaded through a round lets you rip back to a known point instead.
Frequently Asked Questions
Why does a dropped stitch run down the fabric?
When a stitch slips off the needle, nothing holds it any more. The horizontal strands below it let go one row at a time, which is why it looks like the stitch is running down the fabric.
Can I fix a stitch that has run down several rows?
Yes. The method is the same however far it has run — you pull one strand through per row, from the bottom of the ladder to the top.
What if I only notice the dropped stitch much later?
You can still ladder it up from where it stopped to the row you're on now. Put a safety pin through it as soon as you spot it, even if you don't have time to fix it straight away.
How do I fix a dropped stitch in ribbing?
Work out whether the stitch sits in a knit column or a purl column. In ribbing a column stays the same all the way up: a knit column is picked up as knit on every row, a purl column as purl on every row (both seen from the right side).
What if the stitch has run all the way out and left a hole?
If the fabric already has a visible hole, our guide to fixing holes in knitting walks through closing it.